We cook meals for the kids on Sundays and Wednesdays. They each eat 2 containers per day (one for lunch, one for dinner). This makes life easier for their ‘nanny’ and also for me – plus I get the peace-of-mind of knowing that they’re always getting to eat something healthy and yummy!
This is a favorite amongst my two (Hudson & Everleigh) and Ava! You can alter this meal to make it suitable for younger babies, down to a STAGE 3. I used to it that way for Everleigh when she was 6-8 months old. Also, you can make this as organic or as “normal” as want.
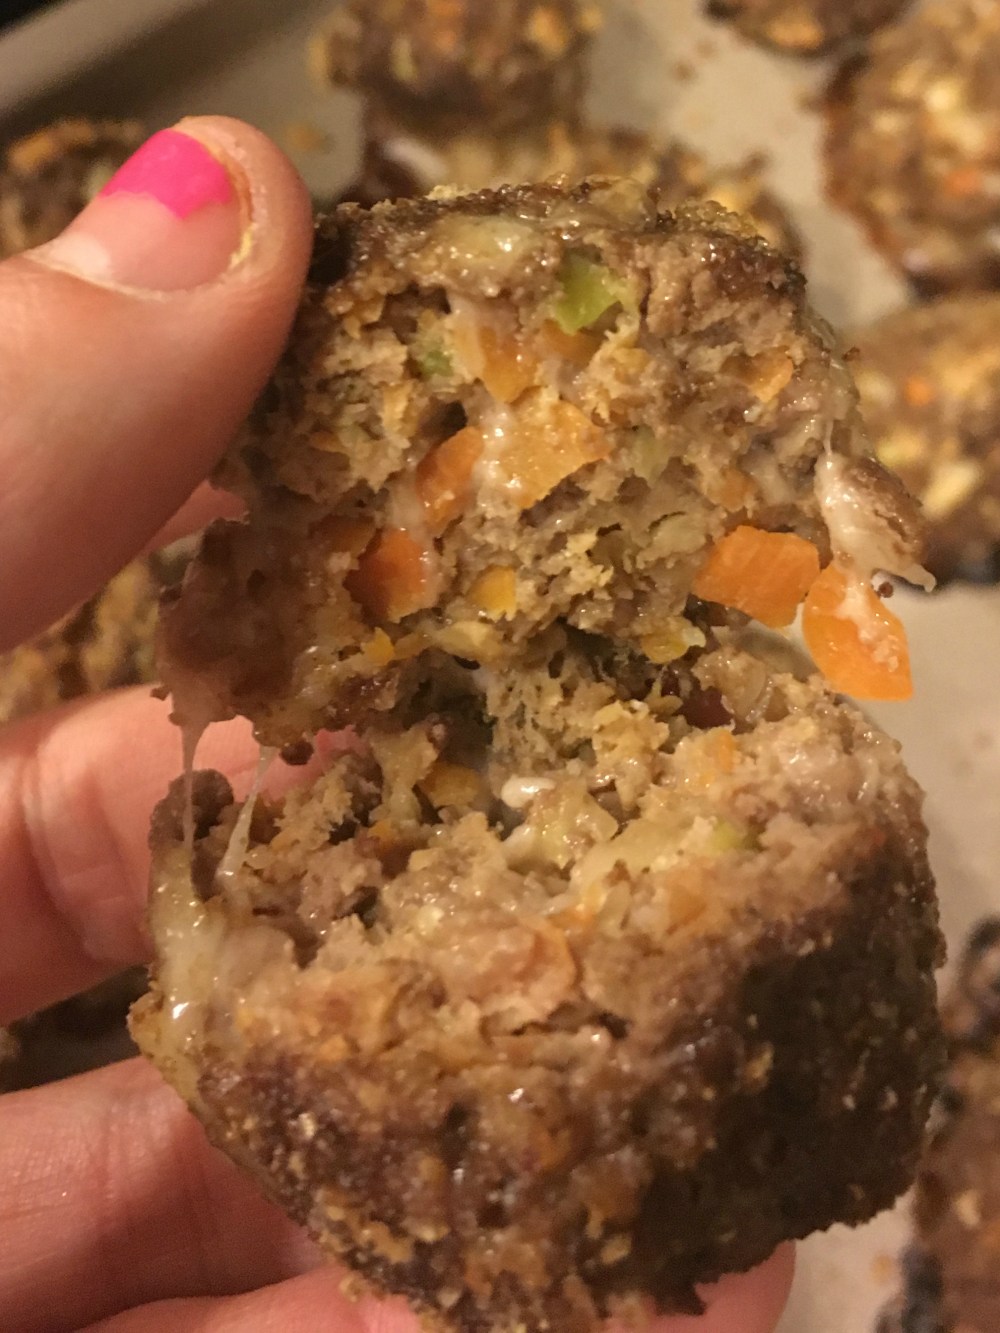
These are absolutely delicious, in my opinion! I actually hate vegetables, but I love the meatballs with “hidden veggies”. The carrots make them a little bit sweet! I like to eat them by theirselves, even without sauce.
The Ingredients I use are:
- Lean Ground Beef, 97%/3%, organic (you could use turkey meat or ground chicken)
- Mozzarella Cheese, 1/2 cup, low fat*
- Pasta Sauce, Prego, natural
- Carrots, whole, organic, 4-5 skinny ones*
- Zucchini, large, organic*
- Spaghetti Noodles, organic whole wheat (any pasta will do!)
- Minced Garlic, organic, 1 T*
- Italian Seasoning, 1 T*
- Butter, 1 T*
- Egg, 1, Organic
- Bread, 2 pieces whole wheat, heavily toasted
- Additional ingredients, if you like: 1/2 onion, pepper, Alfredo sauce*
*ingredient not required, but it won’t be as good without it, just sayin’.

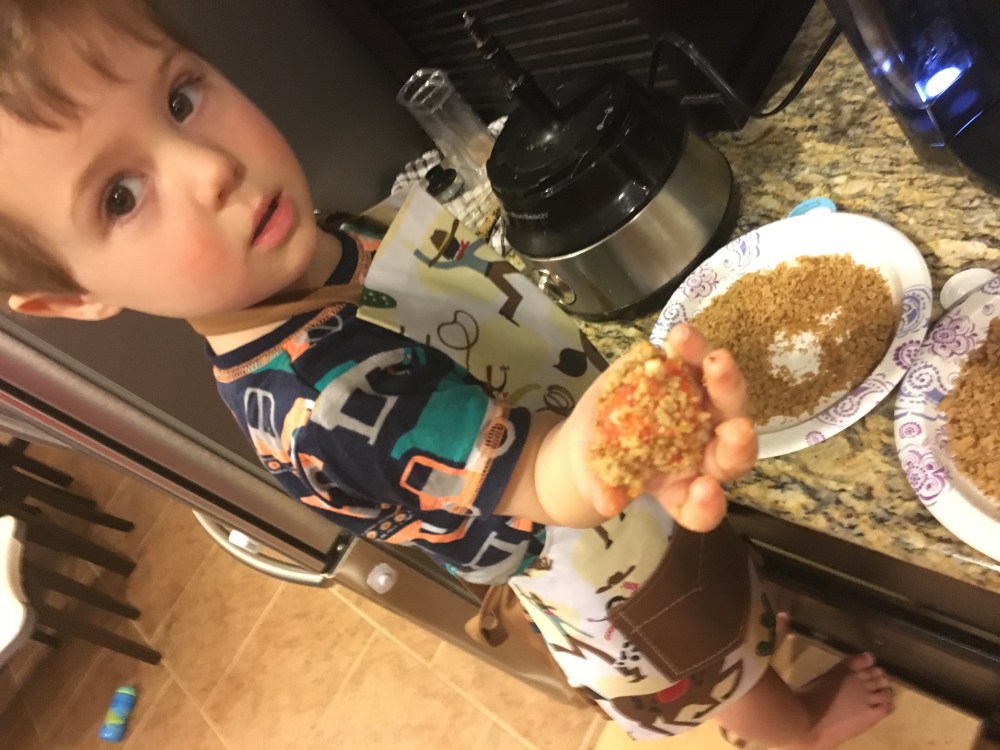
It’s always more fun if you have a toddler or two helping in the kitchen, trust me. It’s not like you could get it done more quickly, efficiently, or cleanly without them…
What to do:
- Prep:
- Pre-heat the oven
- Boil water for pasta
- Oven/Toaster-Oven/Toaster:
- Toast 2 pieces of bread – needs to be seriously dry when it’s done!
- Veggie-Prep:
- Wash, Peel, & Chop Carrots (doesn’t have to be finely chopped at ALL – or, you could used canned)
- Chop the zuchinni
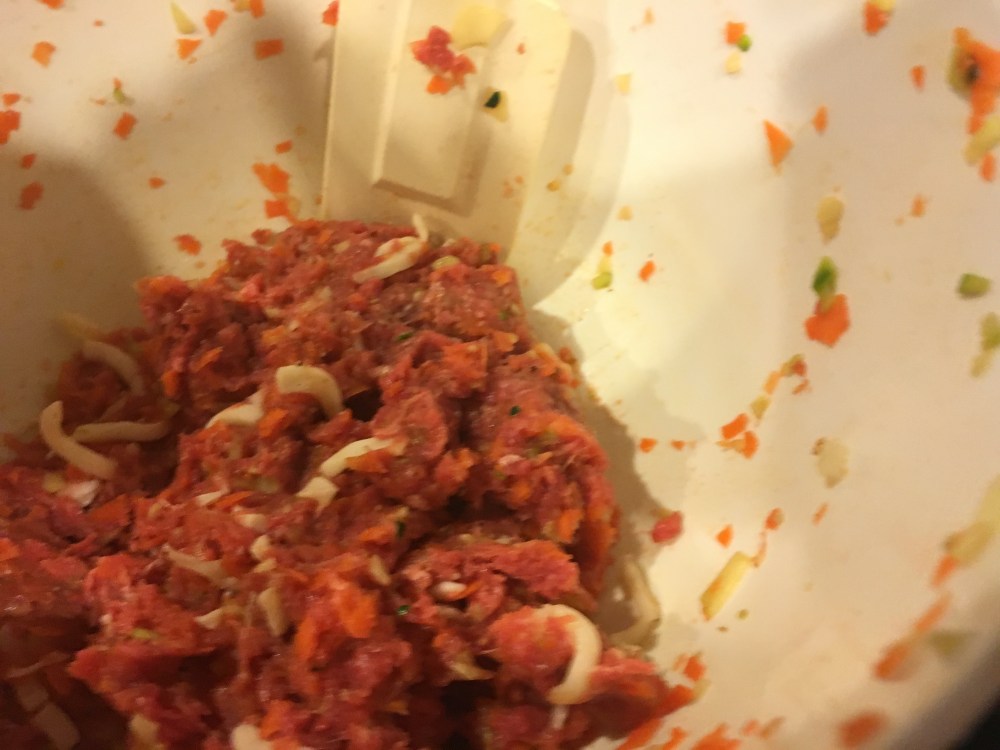
- Put it all in the food processor (otherwise, you DO have to finely chop or grate it)
- Bread Crumbs:
- Put the toast in the food processor (or buy bread crumbs…)
- Large Mixing Bowl: ALL INGREDIENTS except spaghetti, sauce, and bread
- Make the Meatballs:
- Roll the meat into small balls (I make mine about 1″ in diameter)
- Roll in the bread crumbs – it’ll stick to the raw meat
- Place on a baking sheet (I line mine with foil so I don’t have to clean as hard!)
- Bake:
- 400F for 20 minutes

- 400F for 20 minutes
- Noodles
- Put the pasta in, it usually takes 7-10 minutes, but read your specific pasta
- Drain
- Add 1T butter or 1T olive oil
- Use your kitchen scissors and tongs to cut it up (may not be necessary, depending on your child’s age)
- Mix with pasta sauce
- ALTERNATE: STAGE 3 PREPARATION
- To make ONLY Stage 3:
- Cut out the Italian seasonings, egg & Bread Crumbs
- Brown your meat
- Make your pasta
- Food Processor:
- Mix everything together: browned meat, veggies, 1/2 T minced garlic, pasta, sauce
- Blend it for a VERY brief time – you still want it chunky for this age so they can get used to the textures! The pieces will be very small, though, at maximum, they should be pea-size.
- To make for Toddler + Stage 3 eater:
- Follow instructions 1-5.
- Brown half your mixture, and make meatballs with the other half.
- Once pasta is finished, you’ll puree half the pasta with the browned meat mixture.
- Blend it for a VERY brief time – you still want it chunky for this age so they can get used to the textures! The pieces will be very small, though, at maximum, they should be pea-size.
- To make ONLY Stage 3:
- ASSEMBLING:
- Toddlers:
- On the left side, I put 2 meatballs with a spoonful of sauce on top. This is important to keep the meatballs from drying out when you reheat.
- On the right side, I put a lot of spaghetti because my kids love it.

- Stage 3
- Put about 2-4 ounces each in air-tight containers.
- Store 3 days of food in the fridge at a time, and the rest in the freezer.
- Every day, move 1 container from the freezer to the refrigerator.
- Toddlers:
And there you have it!
